To set up the IceTV Guide on your new Humax 2tune (HDR-3000T) during the initial installation wizard please follow the instructions below.
The following steps are for existing IceTV users, including people who purchased their Humax from IceTV but have not set it up yet. If you ordered your Humax from IceTV we will have created an account for you, if you didn't already have one.
- If you do not have an IceTV account and you did not purchase the Humax 2tune from IceTV you need to follow the setup steps at this link.
- If you have already setup your Humax 2tune and only need to enable IceTV you need to follow the setup steps at this link.
If you have any questions please contact Customer Service.
Connect the cables to your Humax 2tune
The first step to setting up your new Humax 2tune is to connect the necessary cables as shown in the manual included with your new Humax PVR. This includes power cable, antenna cable and AV cable(s) - either a HDMI cable or a Yellow, Red and White analogue cable - and optionally an optical audio cable if you have amplifier. If you will be using Ethernet to network the Humax PVR to your home network you need to connect an Cat5 or Cat6 Ethernet cable, or if you will be using Wireless you need to plug in the included Humax USB WiFi dongle into a USB port on the Humax (preferably the rear port).
Initial setup of the Humax 2tune
Once the necessary cables (and USB dongle if using WiFi) are connected to your Humax you are ready to turn the TV on, turn the Humax on and select the correct AV Input on the TV so you can see the screens from the Humax on the TV. The following steps will take you through the Humax installation wizard and some other required settings.
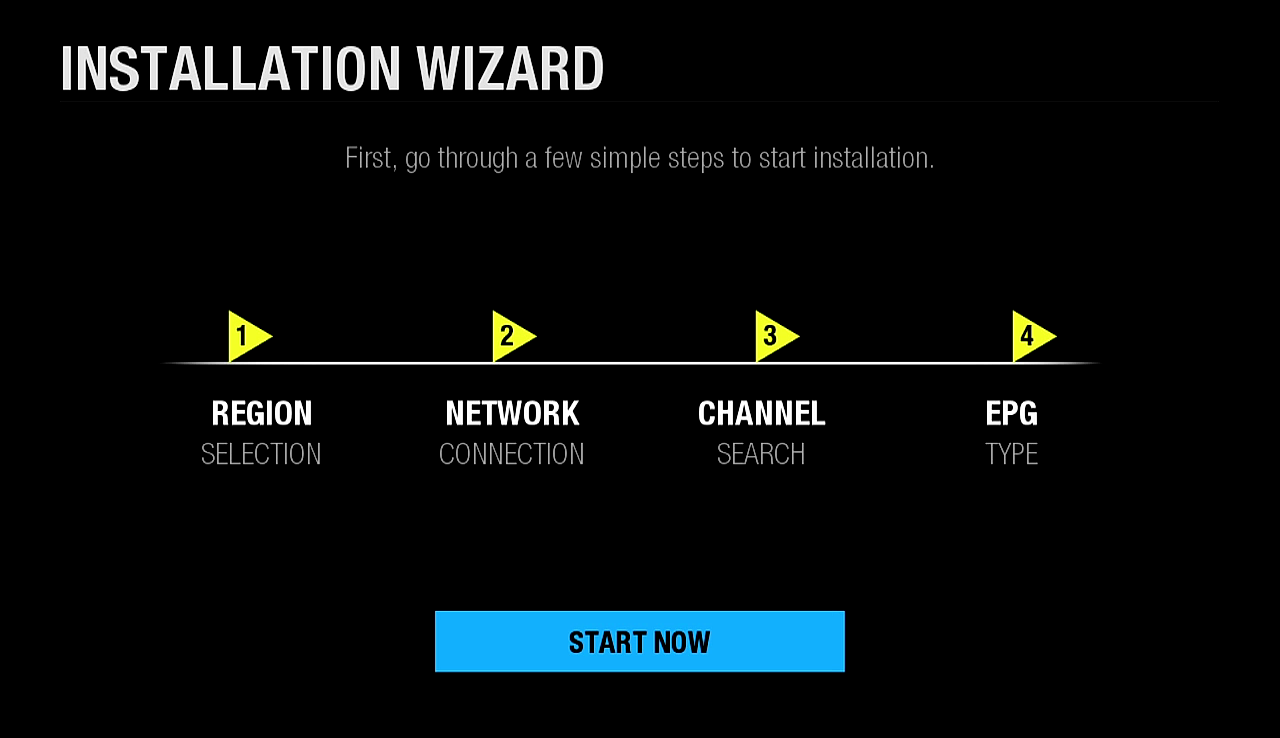
- After the initial Humax boot-up and loading screens have finished the first screen of the installation wizard you will see just informs you of the steps ahead. Press the OK button on the remote control to start the installation wizard.

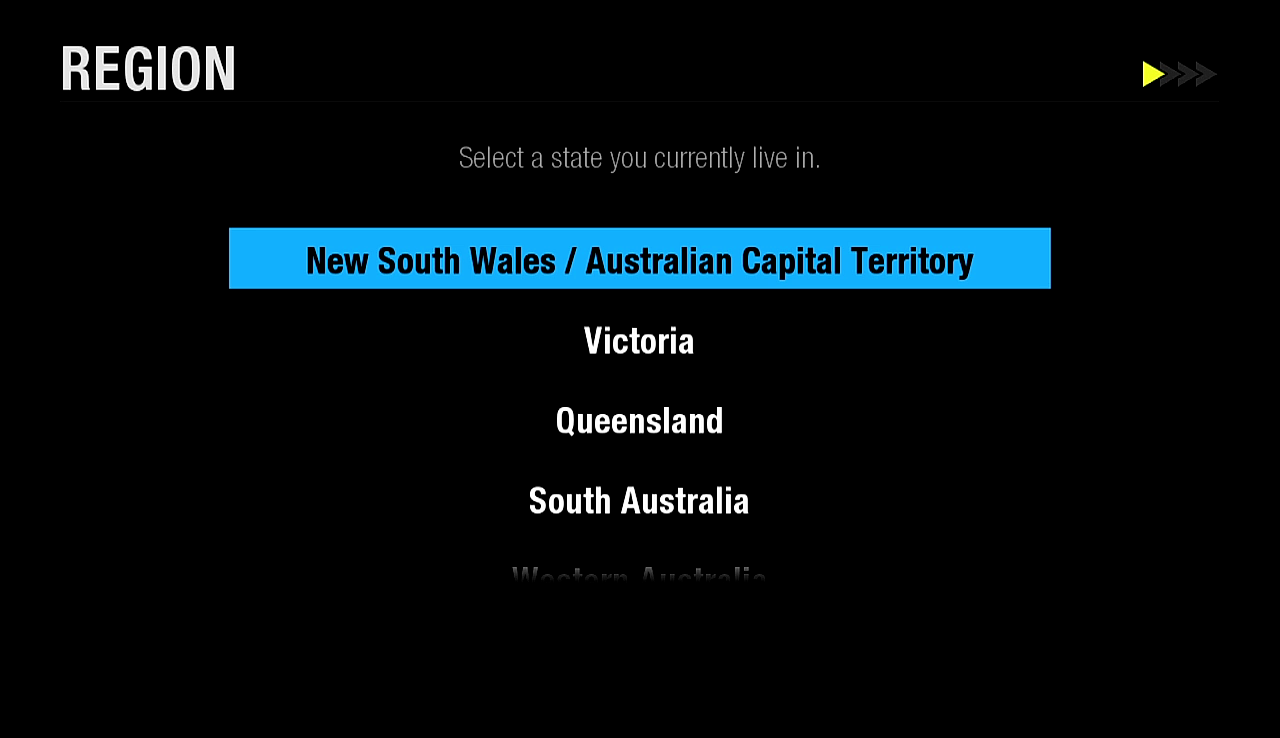
- The next screen you will see is the region selection screen, where you select the state or territory that you live in and press the OK button on the remote control.
- Check you have a network cable or USB WiFi dongle plugged in (do not plug both in) then click OK on NEXT. If you are using a network cable go to step 4.

- If you have the USB WiFi dongle plugged in the next screen will ask you to select your wireless network from the wireless networks that are in range. Highlight your network and press OK. Note: If you have hidden your wireless network press the [+] button to enter your network name, security type and password.

- Click OK while the Password text box is highlighted and an onscreen keyboard will appear.

- Using the onscreen keyboard type your wireless password then select OK on the keyboard and press OK on the remote.

- Scroll down to the OK button onscreen and press OK on the remote.

- Hopefully the next screen will show that the Humax TV recorder is now connected to the Internet. When you click OK on NEXT the TV recorder will check if a newer software version is available.


- Once the Privacy Policy and Terms & Conditions screen has finished loading you can (read the policy and conditions if desired) then click OK on DONE.

- Now check that you have connected your antenna cable to the Humax and that the other end is plugged into your antenna wall socket then click OK on NEXT.

- Wait for the channel search to finish then click OK to save the channels.

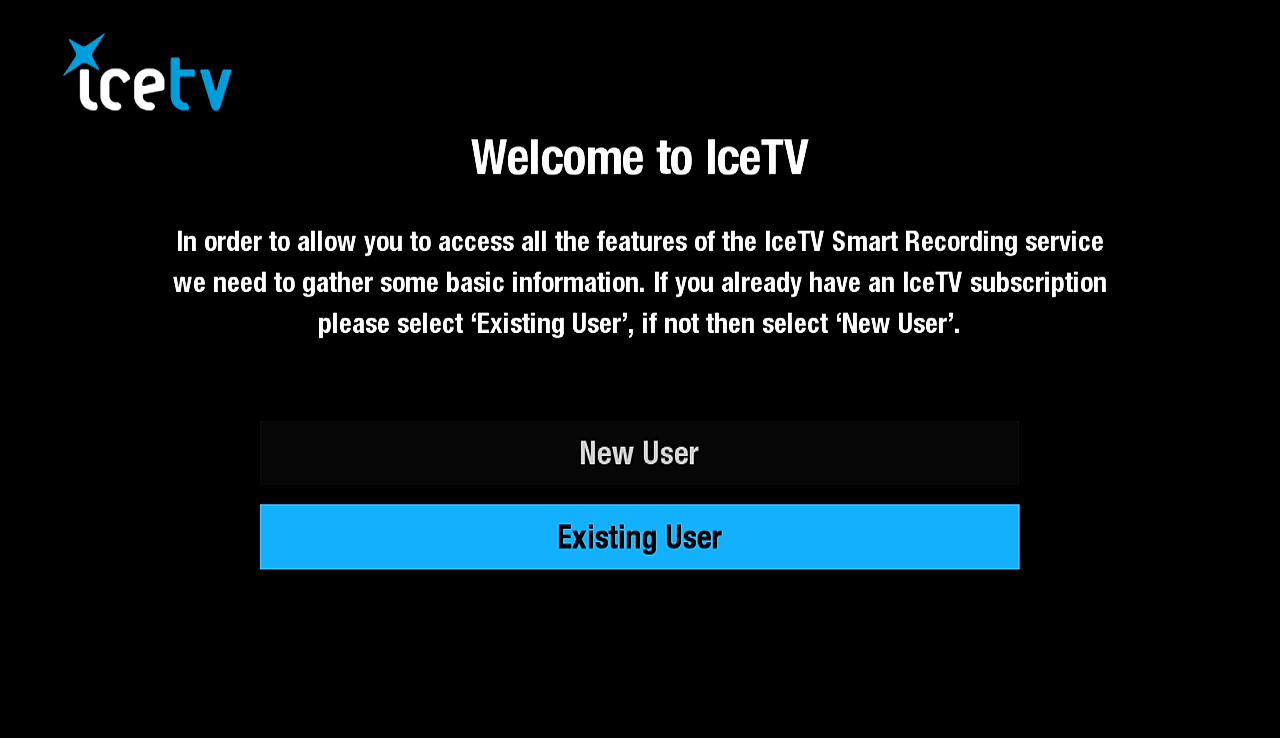
- After reading the introduction to IceTV click OK to move to the next screen.

- With 'IceTV Premium EPG' highlighted in blue click OK to move to the next screen.

- If you do not already have an IceTV account and did not purchase the Humax 2tune from IceTV, see the steps for New Users here. If you do have an IceTV account highlight 'Existing User' and click OK.
- Highlight the Email Address box then click OK.
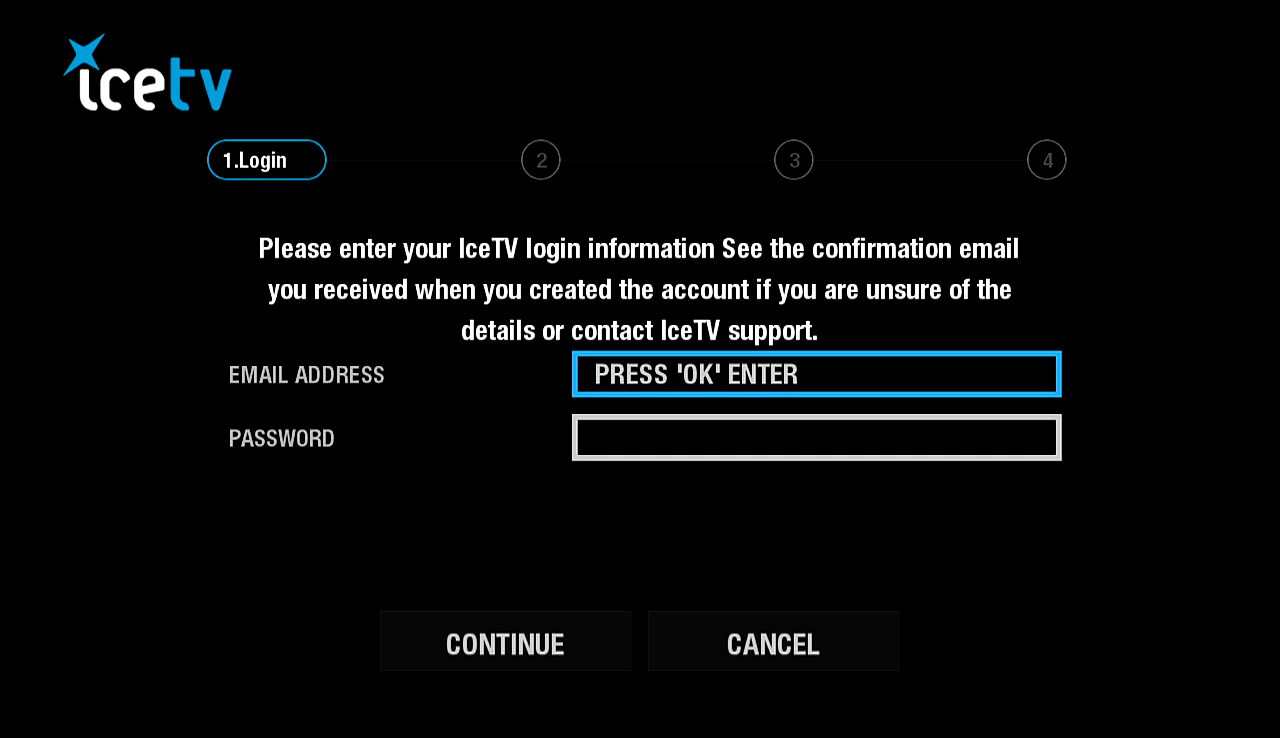
- Using the onscreen keyboard type the email address that is in your IceTV account then select the onscreen OK button and click OK on the remote.

- Highlight the Password box and click OK, then type and save your IceTV password. Then select Continue and press OK. Warning! When entering your password wait for each letter or number to change to an asterisk before entering the next letter or number, or the password will be incorrect.

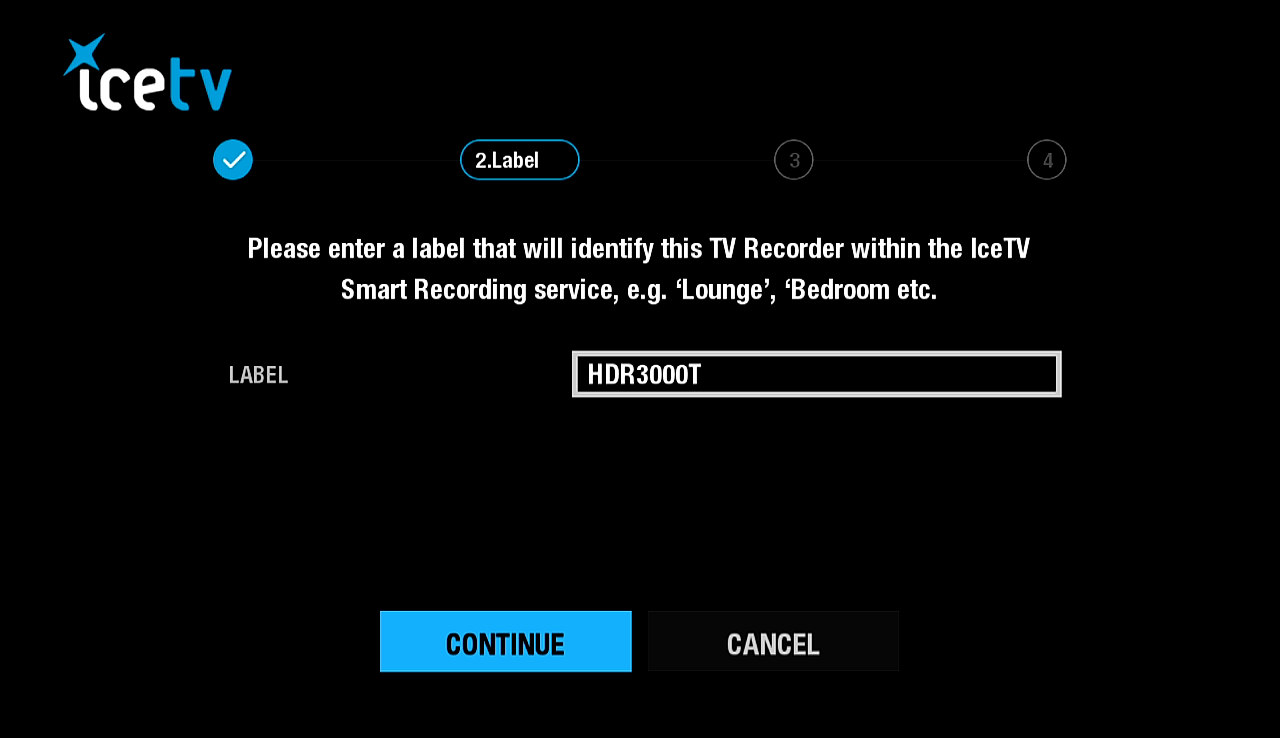
- On the next screen you can change the Label that IceTV will use for your TV recorder, or you can leave it as HDR3000T. Then select Continue and press OK.
- The Humax will now log into your IceTV account, add the new device and download the TV guide.
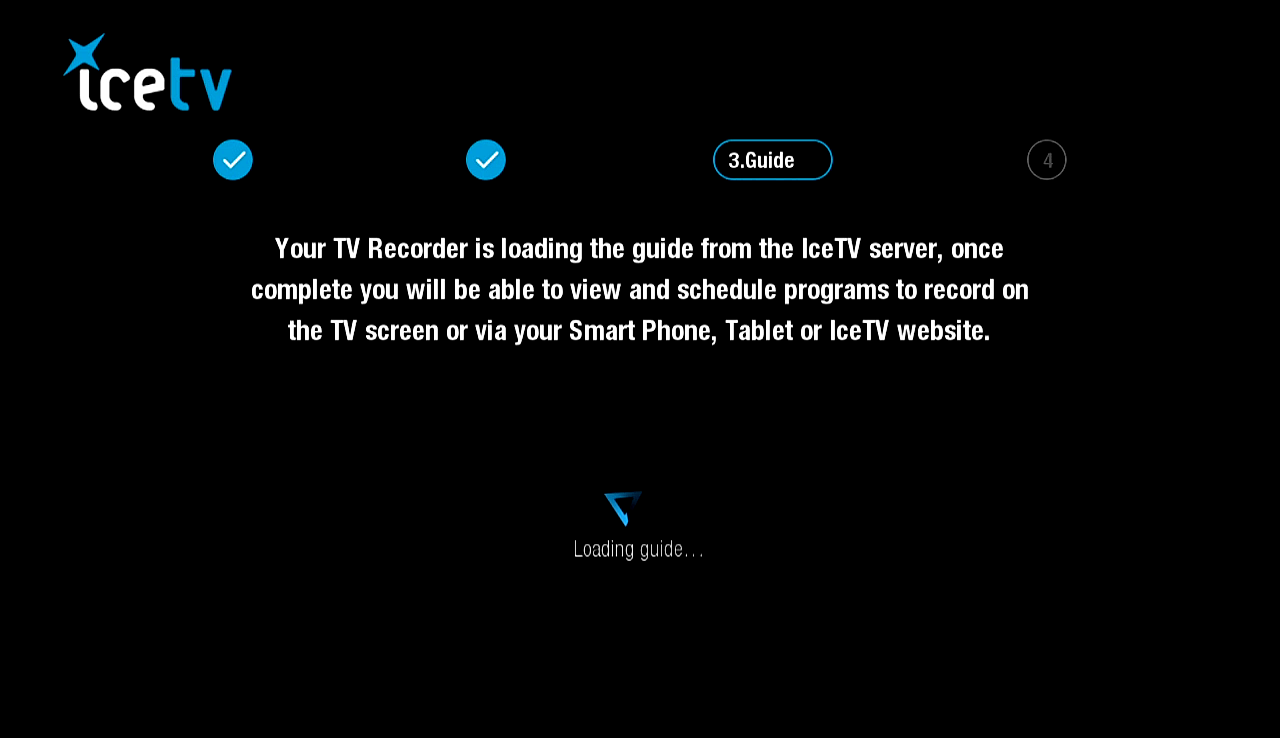
- Once the TV Guide has downloaded click OK and then on the Result screen click OK again on the onscreen Exit button.
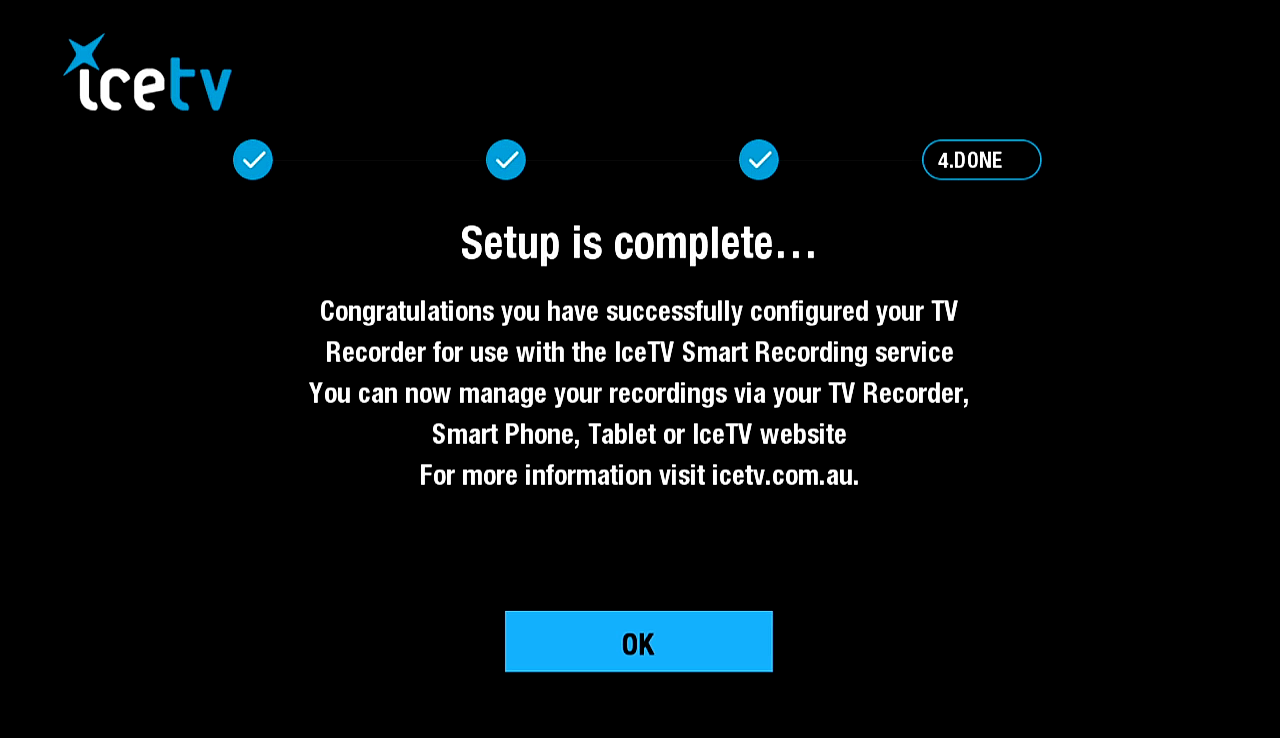

- You will now see a static slideshow of 5 images introducing some of the features of the 2tune. Each click of the right arrow button on the remote (next to the OK button) will change to the next image. Once you get to the last image (with the blue X in the top-right corner) you can click OK on the remote to close the slideshow.


Other important settings you need to configure
There are a few important options you should set in the Settings menu to ensure you don't miss the end of your recordings and to get the most out of your new Humax 2tune. This link will take to a page showing the simple steps to configure these options.